Set up Cloud Build & Connect Repository
Steps:
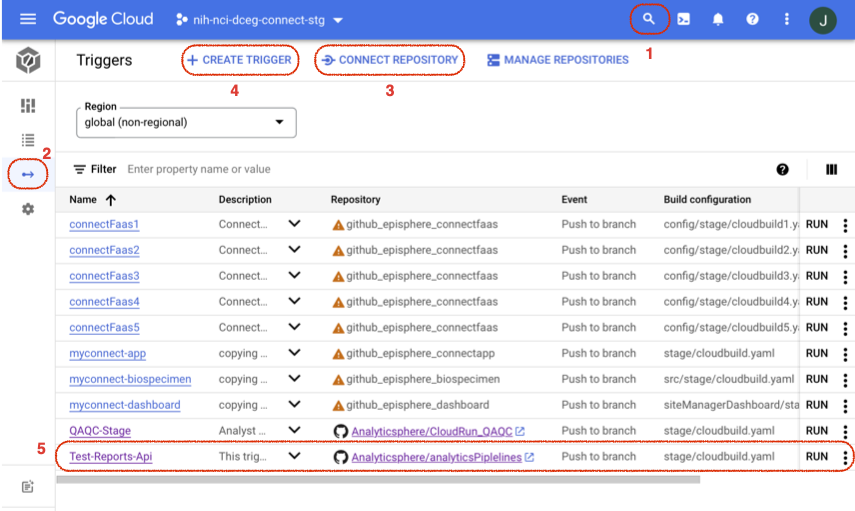
- Navigate to Cloud Build using the search bar.
- Click on the Triggers o-> icon in the left panel.
- Click Connect Repository and select the repository holds your code. This repo must contain the following files:
- plumber_api.R (example name)
- report_generator.RMD (example name)
- Dockerfile (actual file name)
- cloudbuild.yaml (actual file name)
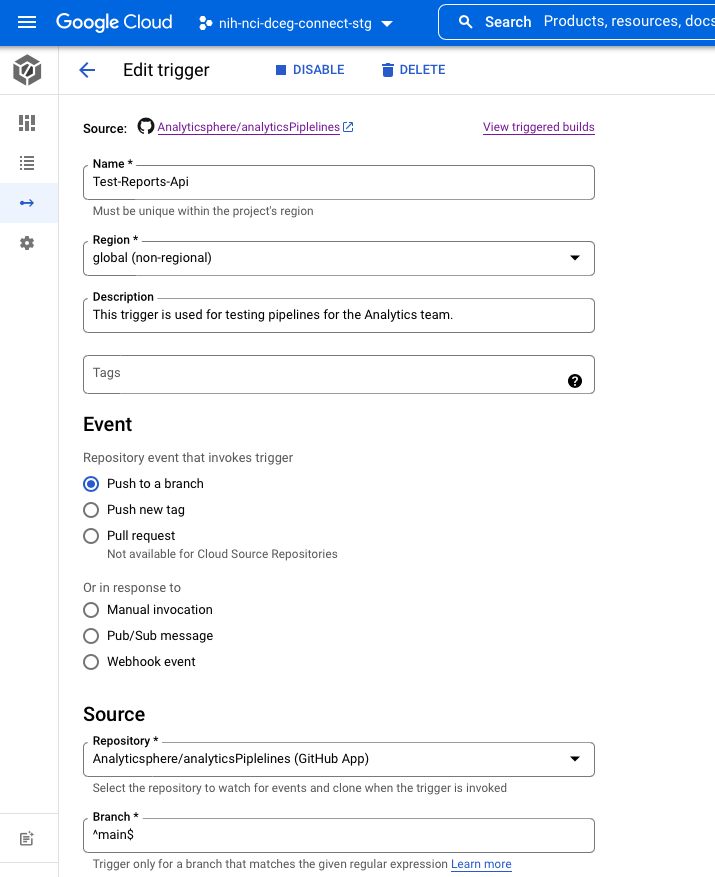
- Click CREATE TRIGGER, and enter the following selections:
- In the Name text box, enter the name of your trigger, e.g., “Test-Reports-Api”.
- Under Region dropdown, select global (non-regional).
- Enter a Description.
- Under Event, select Push to a branch.
- Under Source > Repository, select the repository you linked in the previous step, e.g., Analyticsphere/analyticsPipelines.
- Under Source > Branch, select
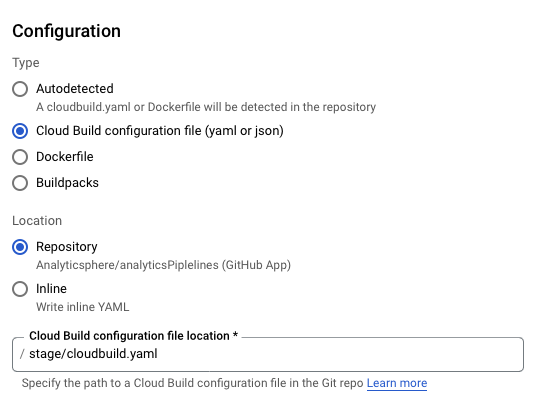
^main$. - Under Configuration > Type, select Cloud Build configuration file (yaml or json).
- Under Configuration > Location, select Repository.
- In the Cloud Build configuration file location text box, type the path to your cloudbuild.yaml file, e.g., “/stage/cloudbuild.yaml”.
- Leave all other options to defaults and click Create.
- Make sure that your trigger appears in the list, e.g., Test-Report-API.
Use the images below as a guide.