-
Notifications
You must be signed in to change notification settings - Fork 1
Expand file tree
/
Copy pathsoftware_setup.qmd
More file actions
16 lines (15 loc) · 2.19 KB
/
software_setup.qmd
File metadata and controls
16 lines (15 loc) · 2.19 KB
1
2
3
4
5
6
7
8
9
10
11
12
13
14
15
16
# Software setup
1. For this workshop, we prepared a virtual image containing all the necessary software, packages and settings we will need. To clone this image into your machine, you first need to download and install **Docker Desktop** from [this link](https://www.docker.com/products/docker-desktop/). Make sure to choose the right version for your computer (Windows, Linux, MacOS Intel Chip or MacOS Apple Chip).
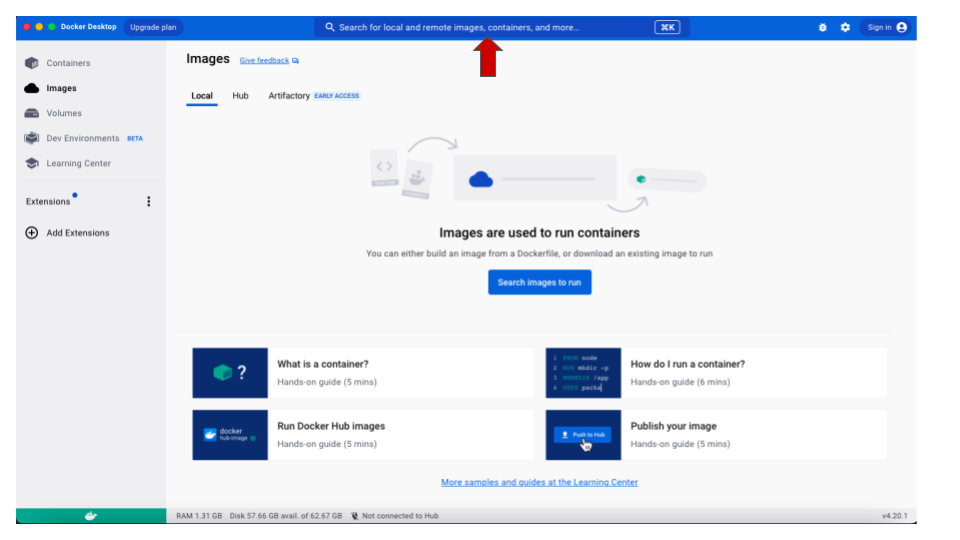
2. Once installed, open Docker and use the search bar on the top to look for **iovercast/mess**. This is where the image is stored.
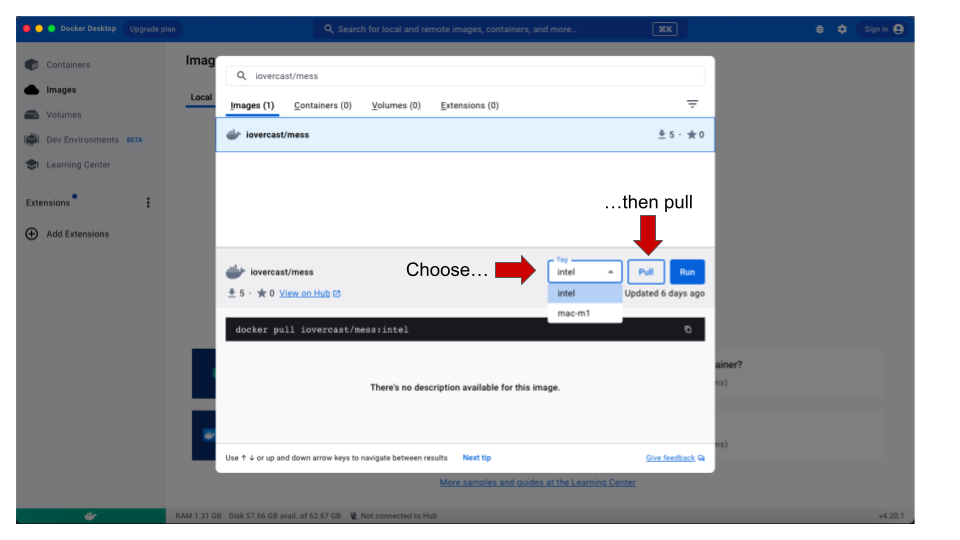
3. Once the image is found (the name **iovercast/mess** will show up in the drop-down list), you need to choose the processor type for your computer. If you are using a M1/M2 MacBook, in the *tag* drop-down menu, choose `mac-m1`. For any other architecture (Windows, Linux and non-M1/M2 MacBooks), choose `intel`. Then click on `Pull`.
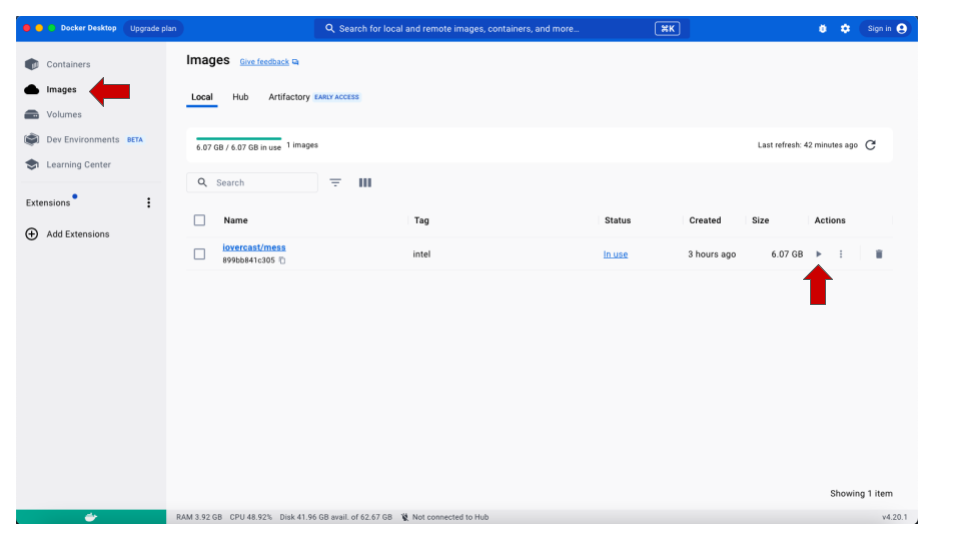
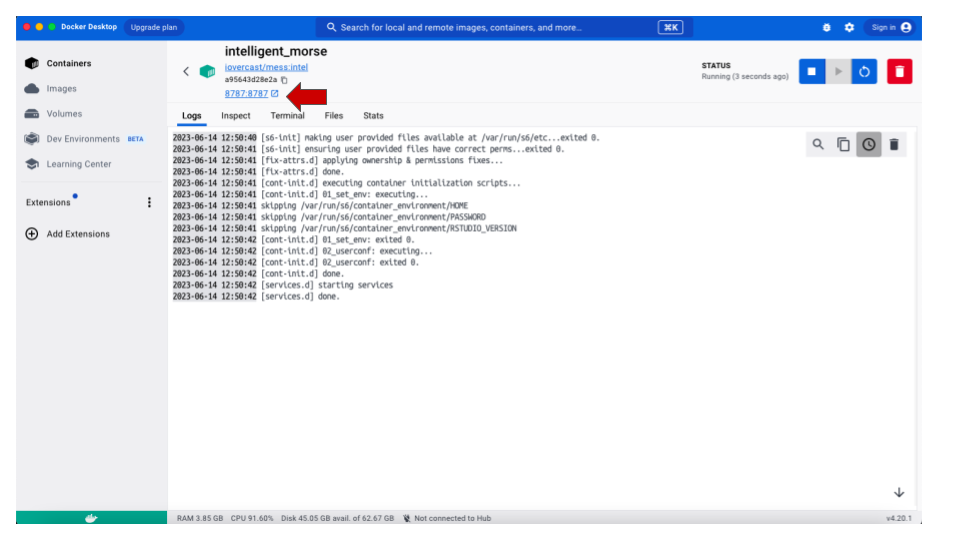
4. Once the pull is done, click on the **Images** option in the menu to the left. You should be able to see the new **iovercast/mess** image listed there. To get it running, click on the `Play` icon under **Actions**.
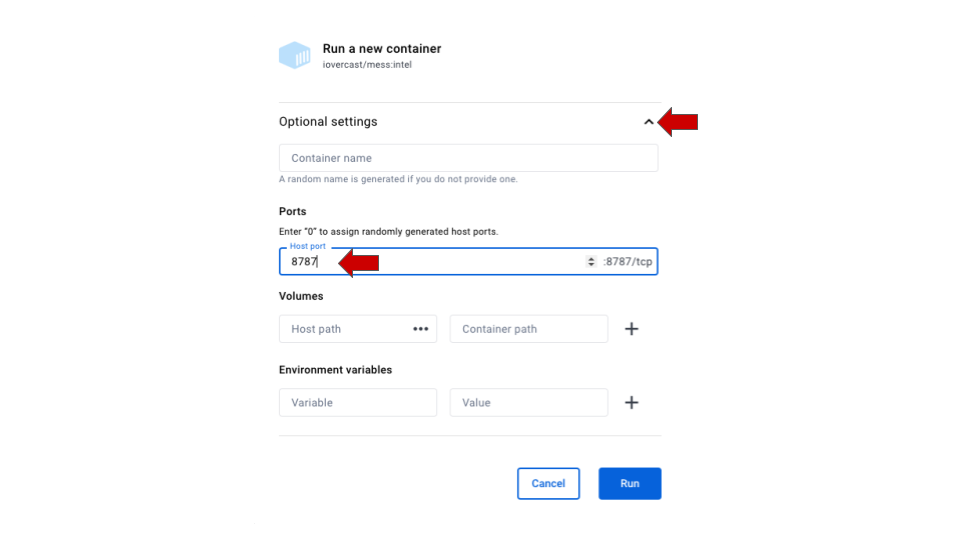
5. **Make sure to add a port for the image.** When prompted for Optional settings, click on the arrow to open the drop-down options and type 8787 in the `Host port` option. Then click on Run.
6. In the new screen, click on the `8787:8787` link below the image name.
7. A page for `rstudio-server` will open on your internet browser, prompting you for the username and password. Type `rstudio` for both username and password.
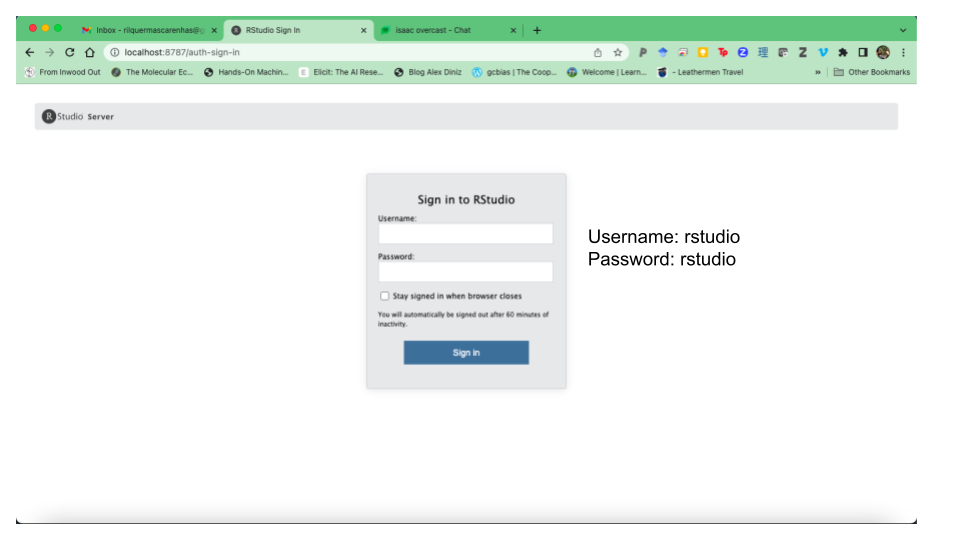
7. If an RStudio screen opens on your brower, you are ready to start working.