| layout | default |
|---|---|
| title | Getting Started |
| nav_order | 2 |
| description | ... |
| permalink | /getting-started/ |
{: .no_toc }
Table of contents
{: .text-delta } 1. TOC {:toc}{: .d-inline-block }
The following guide assumes that the user/maintainer has a basic understanding of AWS (particularly S3 buckets), Python and some basic HTML. However, do not worry in case you have never used them before, we will guide you through and illustrate below where and how each component comes into play.
To download papertool on your local machine, run:
git clone https://github.com/sodalabsio/papertool.git
Alternatively, you could also fork the repository to your personal github account and work from there.
Before starting with PaperTool, you will need valid three-letter RePEc Archive code (aaa) and a six-letter Series code (ssssss) associated with your working paper series. Please check out the RePEc step-by-step for the same.
Once you have papertool on your machine, you will see the following main folders/files:
./papertool
├── aws_resources
|   ├── cloudformation_templates
|   |   ├── CreateLambdaAPI.yaml
|   |   └── CreateS3Buckets.yaml
|   └── s3_buckets
|       ├── code_bucket
|       ├── site_bucket
|       └── working_papers_bucket
...- Log in or create your AWS account
- Once you have access to the AWS Console, launch the CloudFormation service. Then:
- Click on the
Create Stack - Enter name of the stack (any name of your choosing)
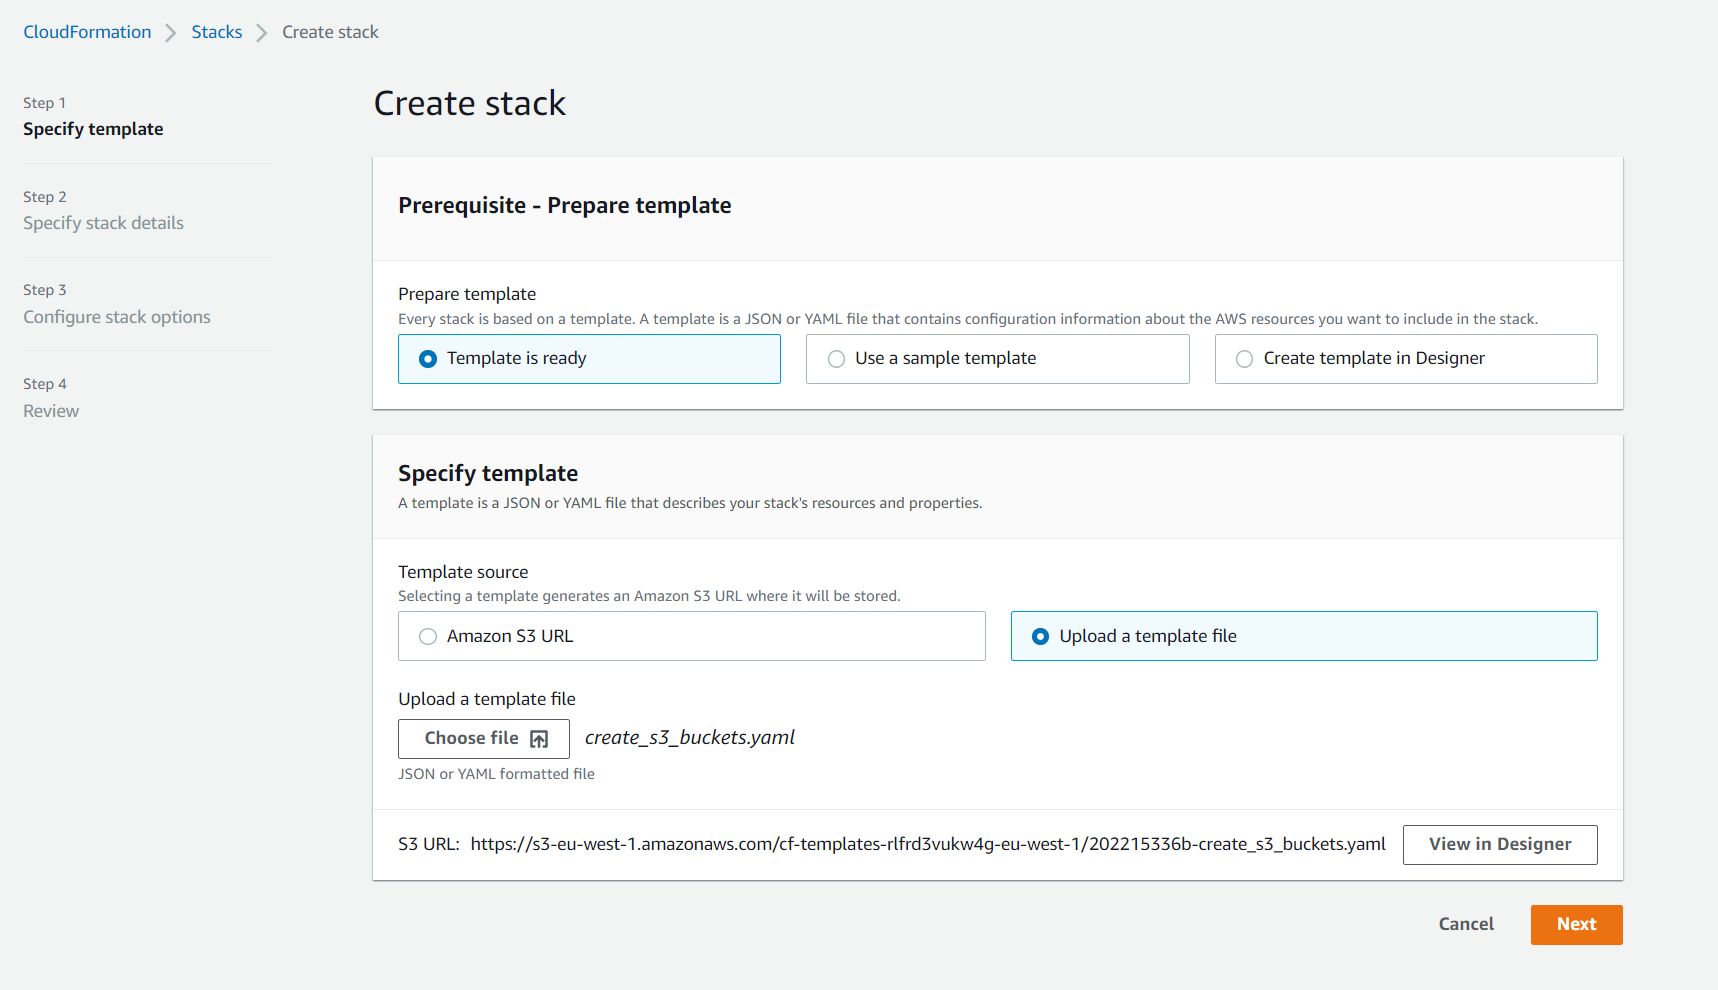
- Under
Prerequisite - Prepare templateselectTemplate is ready - Under
Specify templateselectUpload a template fileand uploadCreateS3Buckets.yamlfile.
 - Under `Specify stack details` please enter your working paper series details (such as RePEc codes for the series and archive). **Important:** Please assign the name of this bucket as per your lab/department name. E.g. If you set the bucket name as `econdept`, it will create a site under `http://econdept.s3-website-ap-southeast-2.amazonaws.com/`.
- `Configure stack options`
- Review and finally click on `Create Stack`
- Wait till the `Status` shows `CREATE_COMPLETE`
- Under `Specify stack details` please enter your working paper series details (such as RePEc codes for the series and archive). **Important:** Please assign the name of this bucket as per your lab/department name. E.g. If you set the bucket name as `econdept`, it will create a site under `http://econdept.s3-website-ap-southeast-2.amazonaws.com/`.
- `Configure stack options`
- Review and finally click on `Create Stack`
- Wait till the `Status` shows `CREATE_COMPLETE`
- Click on the
-
Navigate to S3 and into your
CodeBucket(Note: You can also directly access the created buckets fromResourcesunder the Stack. The name of the bucket will be the one you entered earlier along with the suffix"-code") -
Once you are inside the S3
CodeBucket, upload (or drag-and-drop) the contents froms3_buckets/code_bucket/. The files are:layer.zipuploadWorkingPaper.zip
-
Now once again under CloudFormation, create a new stack by repeating Step 2 and uploading
CreateLambdaAPI.yamlas the template this time.
- Make sure to click on "I acknowledge that AWS CloudFormation might create IAM resources" before hitting
Create Stack
- Editing site bucket:
- Enter (copy) the appropriate values from the Stack
Outputstos3_buckets/site_bucket/assets/js/settings.js - Upload the contents of
s3_buckets/site_bucket/to yourSiteBucket
- Editing working papers bucket:
- Rename the
aaaandssssssfolders to yourArchiveCodeandSeriesCoderespectively - Replace "aaa" in both
aaaarch.rdfandaaaseri.rdfwith yourArchiveCode - Fill the rdf files with appropriate working paper information. Important: The
URLinaaaarch.rdfshould be theRePEcArchiveURLas it links your archive to RePEc - Open
RePEc/aaa/index.htmland replace ssssss with yourSeriesCodeand the names of redif files - Replace
s3_buckets/working_papers_bucket/template/cover.pngwith your own template. Important: The template should be identical in dimensions (2487 x 3516 px) and layout. - Finally copy the contents of
s3_buckets/working_papers_bucket/to your actual S3WorkingPapersBucket
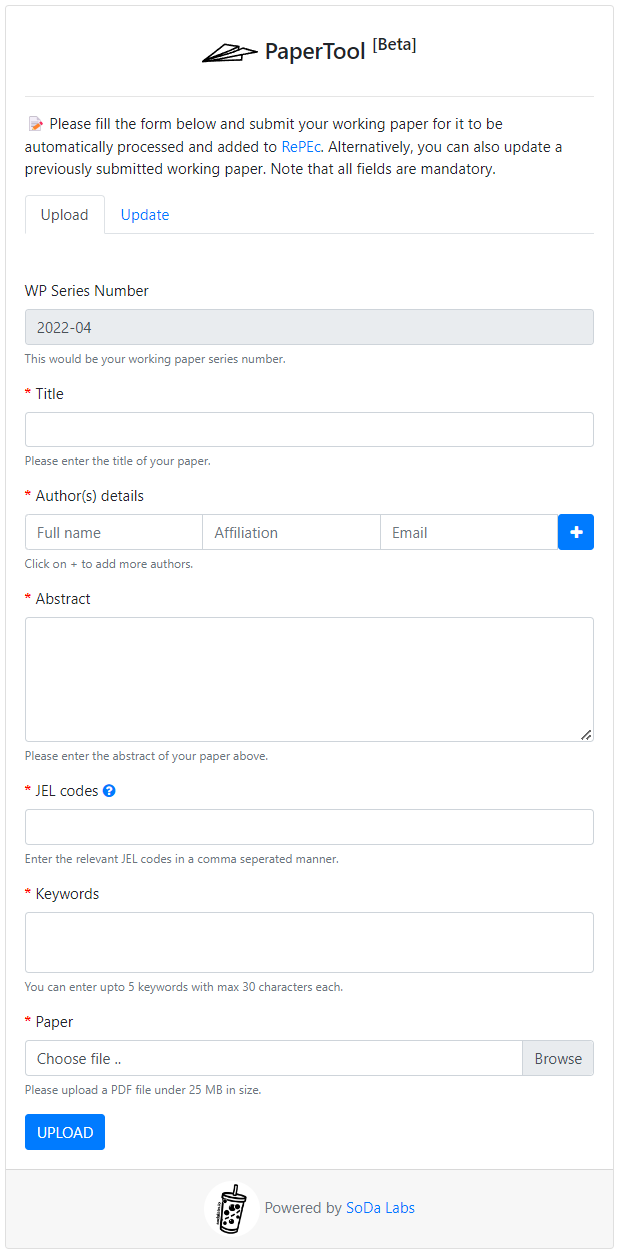
- And that's it! You can now start uploading working papers on your site (refer to your
WebsiteURL)
Incase you have any questions please refer to our FAQ page.