Project 2 Instruction Tailwind CSS, Component and Layouting
Update 1/4/2025
โปรเจกต์ที่ 2 นี้จะแบ่งเป็น 3 ส่วนคือการใช้ Tailwind CSS การใช้ Component, UI Library และการออกแบบ Layout หน้าเว็บ
ทดลองใช้ React JS กับ Tailwind CSS ซึ่งเป็น CSS Library ที่มีความ Utility สูงมาก เราสามารถใช้ Tailwind CSS แทนการเขียน CSS ลงในไฟล์ได้เลย
- นำโปรเจกต์ที่ทำในครั้งแรกมา จากนั้นเปิดคู่กับ Official Document ของ Tailwind CSS เข้าไปหาการ Setting ของ Framework Guild แล้วไปที่ Vite โดยปกติจะเป็น
npm install tailwindcss @tailwindcss/vite- ลบไฟล์
App.cssออกแล้ว ลบการ Import ใน App.jsx ออก
------ import "./App.css"; ----ลบออก- ทำตามวิธีการตั้งค่าใน Doc ของ Tailwind นั่นก็คือ ใน
index.cssใส่
@import "tailwindcss";
- ใน
vite.config.jsใส่ tailwind เข้าไป จะได้เป็น
import { defineConfig } from "vite";
import react from "@vitejs/plugin-react";
import tailwindcss from "@tailwindcss/vite";

export default defineConfig({
  plugins: [react(), tailwindcss()],
});- ลองเขียน UI โดยใช้ Tailwind CSS ในการเขียน Class เช่นการตกแต่ง Header ปรับขนาดด้วย
text-3xl font-boldหรืออื่นๆ ตามต้องการ จากเริ่มต้นจะเป็นแบบนี้

-
ทดลองการใช้ Flex box เช่น เราต้องการทำ กล่อง 3 กล่องเรียงต่อกันในแนวยาวเราจะทำยังไง และลองเขียน Responsive
-
เมื่อลง Tailwind CSS แล้ว บางอย่างจะหายไป เช่น button อาจจะดูไม่เป็น button แล้ว เพราะ based ของ tailwind มันจะ base จริง ลองทำให้มันเป็น button ขึ้นมาเช่น การใส่สี หรือ อื่นๆ เช่น
<button classname="text-base p-2 font-bold bg-green-500 rounded-sm">
  Start
</button>
สภาพหลังจากลง Tailwind CSS ใหม่ๆ โดยไม่ได้แก้โค้ดอะไรเพิ่ม
 สภาพโปรแกรมหลังจากลองใส่ classname ลงไปบางส่วน

การใช้ / ไม่ใช้ Tailwind ในกรณีต้องการทำ Flex box
<div className="my-flex">
  <div>1</div>
  <div>2</div>
  <div>3</div>
</div>.my-flex {
display: flex;
}<div className="flex">
<div>1</div>
<div>2</div>
<div>3</div>
</div>ลองติดตั้ง IntellSense for CSS class names in HTML จะช่วยเป็น autocomplete class ต่าง ๆ จาก CSS ที่เราติดตั้ง และลองติดตั้ง Tailwind CSS IntelliSense จะเป็นการ Preview การใช้งานพวกสีต่างๆ และช่วยการเขียนของ Tailwind CSS
มีหลายแห่งที่ให้ Tailwind Component แบบ copy มาใช้ได้ เช่น Tailwind Components, Tailgrid, Tailwind Element, Flowbite และอื่นๆ อีกมากมาย
ถึงแม้ว่า Tailwind CSS จะมีการทำงานที่ให้อิสระเสรี และมีคนออกแบบ UI Component ให้เราสามารถนำโค้ดของเขามาใช้ได้มากอยู่พอสมควร แต่ว่าในการทำงานหากเราไม่มีเวลามากพอที่จะพัฒนา Component ที่ครบ หรือพร้อมใช้งาน อีกทางเลือกหนึ่งคือการใช้ UI Component Library ต่างไว้อย่างครบถ้วน แม้อาจจะเสีย Performance ไปบ้าง แต่ก็น้อยมากๆ ถ้าหากเทียบกับเวลาในการพัฒนา
UI Components ที่เป็นที่นิยมหลัก ๆ และมี component ค่อนข้างเยอะและครบ เช่น MUI จะมีทั้ง Material UI, MUI Based และ Joy UI, AntD, Mantine แต่พวกนี้อาจจะมีความซับซ้อนบ้าง และยังมี UI Library อื่น ๆ ที่อาจจะไม่ได้ครบแบบนี้ แต่เขียนง่ายลงมา และเหมาะกับระบบเล็กๆ เช่น Chakra UI, Reactstrap, Evergreen UI หรือ Official ของ Tailwind เลยคือ Headless UI รวมถึงที่ได้รับความนิยมมาอย่างรวดเร็วเช่น Flowbite และอื่นๆ อีกมากมาย
UI หลักๆ ที่ศูนย์วิจัยใช้ในตอนนี้คือ MUI และ Chakra UI
- ทดลองลง UI Library ตัวใดตัวหนึ่ง ในตัวอย่างนี้จะใช้ MUI เข้าไปลง package โดยการ npm install หรือ yarn add ตาม document ของ package นั้น ๆ โดยอย่าลืม
--saveเพื่อให้มันบันทึก package ที่ใช้ ลงในpackage.jsonซึ่งพวก Component Library ใหญ่ๆ บางตัว เช่น MUI,JoyUI, Chakra UI, AntD จะมีการให้เราใส่เป็น Provider และ Customize theme ครอบลงไปได้
npm install @mui/material @emotion/react @emotion/styled- สร้างไฟล์
theme.jsหรือชื่ออื่นๆ ก็ได้ โดยเป็น template ตามที่ document กำหนด สำหรับ MUI ที่ใช้จะเป็นดังนี้ (จนงนี้จะเป็น .js ไม่ใช่ .jsx)
import { createTheme } from "@mui/material/styles";

const theme = createTheme({
  palette: {
    primary: {
      main: "#0052cc",
    },
    secondary: {
      main: "#edf2ff",
    },
  },
});

export default theme;- จากนั้นใน
main.jsxทำการ import Provider เข้าไป ถ้าเป็นของ MUI จะทำโดย import จาก@mui/material/styleได้เลย แล้วเอามันมาครอบส่วน Content ของเราเอาไว้ จากนั้น Content ของเราทั้งหมดจะถูก Overider โดย config ที่เราเขียนเข้าไป ไม่ว่าจะเป็นสี ฟอนต์ ขนาด หรืออื่นๆ เราสามารถใส่ได้หมดเลย สิ่งที่เพิ่มขึ้นมาใน index
import { StrictMode } from "react";
import { createRoot } from "react-dom/client";
import "./index.css";
import App from "./App.jsx";
import { ThemeProvider } from "@mui/material";
import theme from "./theme";

createRoot(document.getElementById("root")).render(
  <StrictMode>
    <ThemeProvider theme={theme}>
      <App />
    </ThemeProvider>
  </StrictMode>
);-
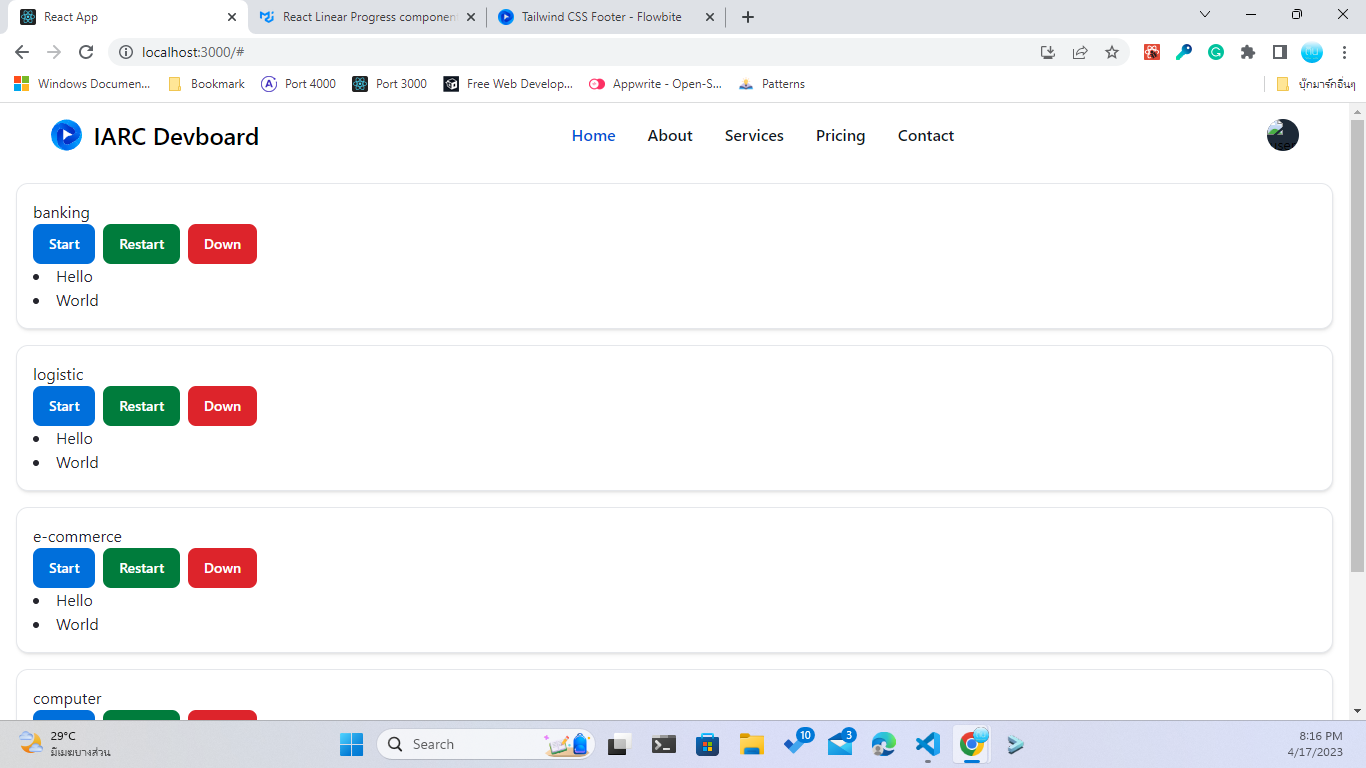
ลองนำ Component ต่างๆ มาใช้ เช่นพวก button ต่างๆ ในส่วนของ tailwind css เอาไว้ใช้สำหรับจัดโครงสร้างของ UI, Utility, Responsive หรือ Component ที่มีความเฉพาะของเรา ตัวอย่างส่วนของโค้ดที่ลองเพิ่มไปใน
ControlCard.jsximport { Button } from "@mui/material"; export default function ControlCard({ title }) { const alertStart = () => { window.alert("คณกำลังกด Start " + title); }; const showData = () => { return ( <div> <li>Hello</li> <li>World</li> </div> ); }; return ( <div className="border p-2 rounded-md shadow-md m-2"> <h3> {title} </h3> <Button variant="contained" onClick={() => alertStart()}> Start </Button> <Button color="info" variant="contained"> {" "} Restart </Button> <Button color="error" variant="contained"> Down </Button> <div>{showData()}</div> </div> ); }
เราจะเห็น UI ที่เป็นรูปเป็นร่างขึ้น และประหยัดเวลาทำงานลง

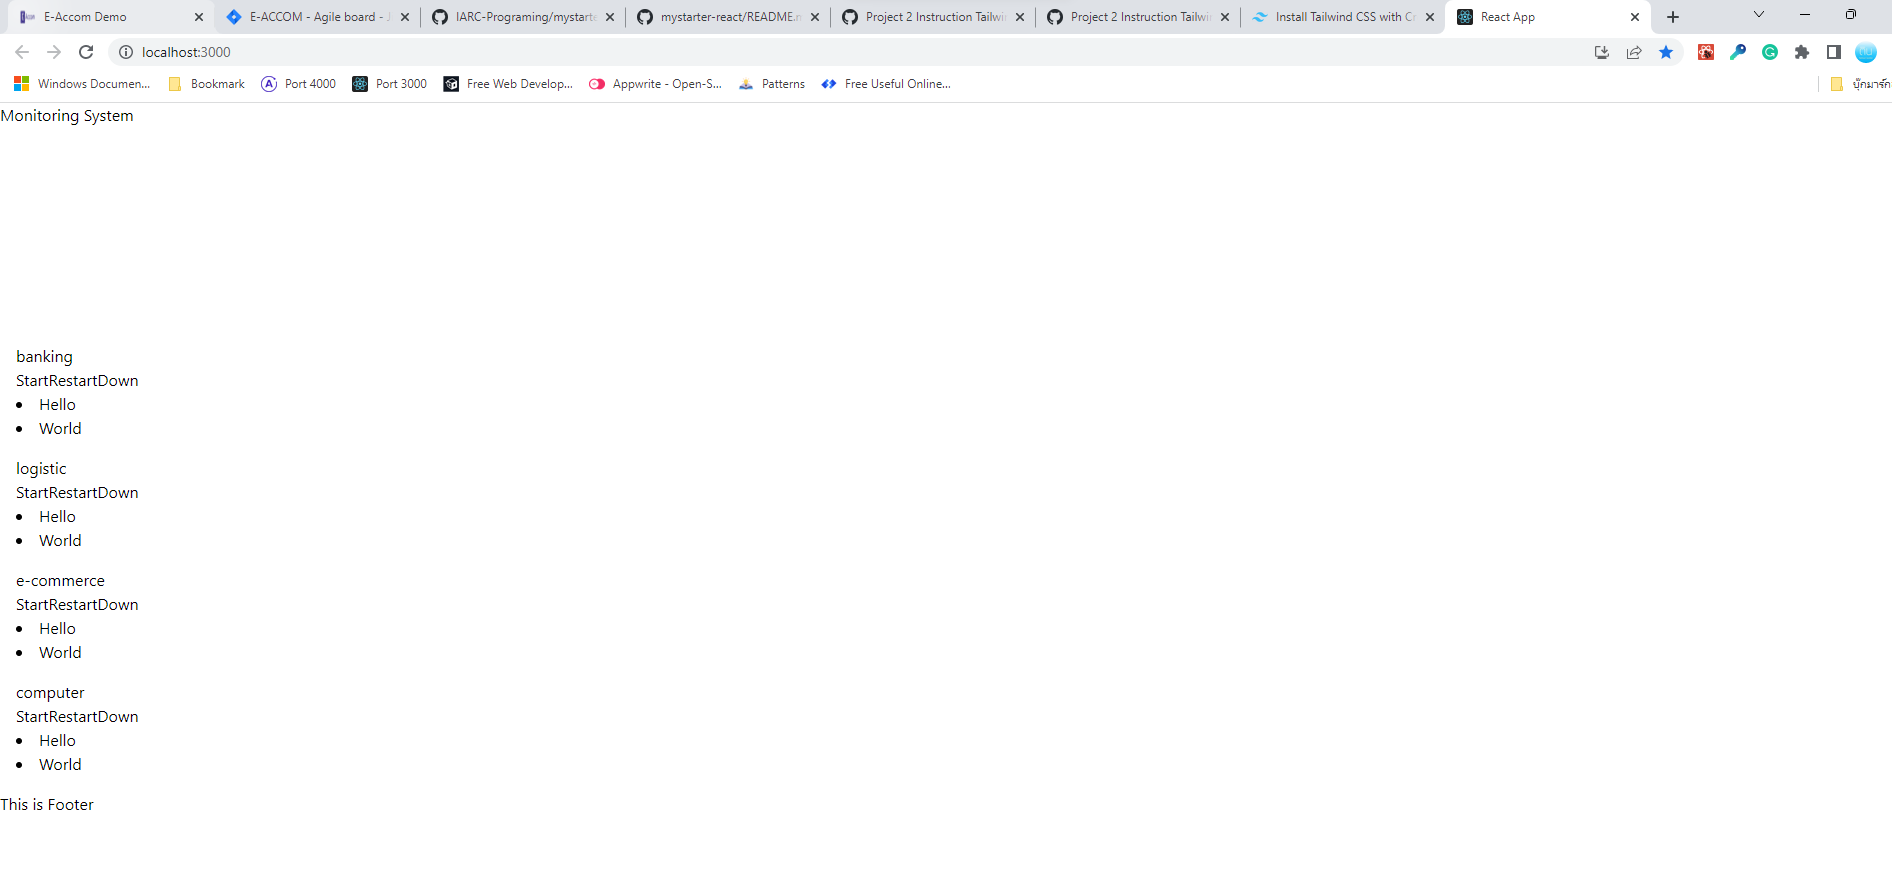
- ทดลองวางพื้นที่ สร้างให้มี Header, Footer, ส่วนของ content และส่วนอื่นๆ ไม่ว่าจะเป็น Sidebars หรืออื่น ๆ โดยจะวางเองหรือ Copy มาจากแหล่งที่ปล่อยอย่าง Tailwind Component หรือ่อื่นๆ ก็ได้ หรือจะเอา component ที่ได้จากการใช้ React Libtaty ต่างๆ ก็ได้
ตัวอย่างหลังจากเสร็จแล้ว (ในตัวอย่างเอา html component จากทาง flowbite) มา