A custom React Hooks library that gives you custom hooks for your code.
🧙
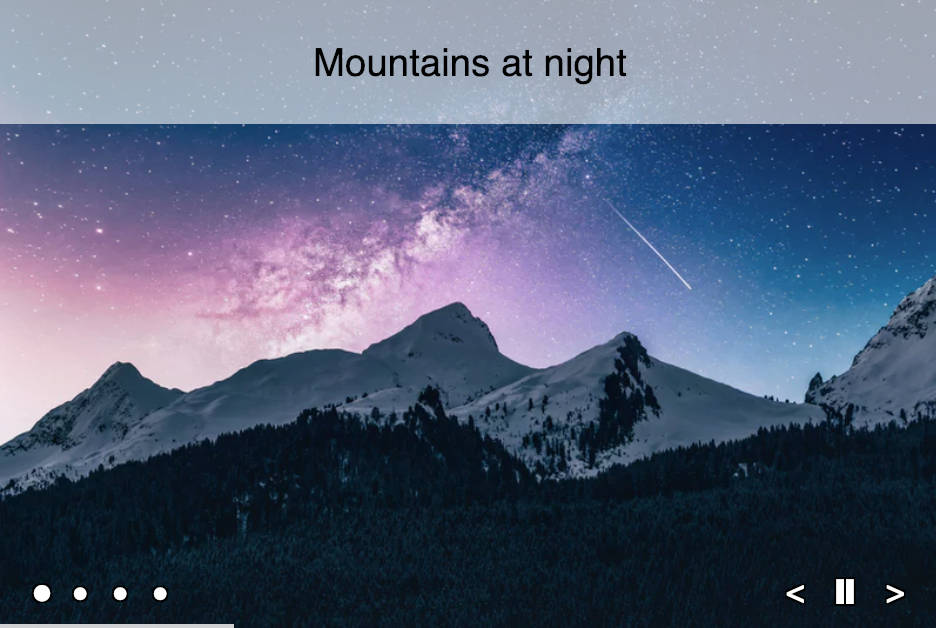
useStepis a multi-purpose step wizard. Build an image carousel!📋
useFormfor dead simple form control with nested object support.🚦
useTrafficLighteasily build a fun traffic light component.‼
useNotto simplify togglingtrue/falsewithout lambda functions.🐐 Full 100% test coverage!
🔥 Blazing fast!
To use react-hooks-helper, you must use react@16.8.
$ npm i react-hooks-helperconst { isPaused, index, step, navigation } = useStep(config);
const [{ foo, bar }, setForm] = useForm({ foo, bar });
const currentValue = useTrafficLight(initialIndex, durations);
const [bar, notBar] = useNot(bool);The new useStep Hook is the new useTrafficLight and is a more general step wizard.
You can use it to simplify many tasks, such as a multi-page input form, or an image carousel.
It has an auto advance function, or control manually by calling previous and/or next.
const { isPaused, index, step, navigation } = useStep(config);You pass useStep a configuration object containing the following (* = required).
| Key | Description |
|---|---|
steps* |
Either an array containing the steps to process or an integer specifying the number of steps. |
initialStep |
The starting step—either a string id or an index. Default = 0. |
autoAdvanceDuration |
If you wish the steps to auto-advance, specify the number of milliseconds. You can also include an autoAdvanceDuration in each step in your steps array, if you wish to have different durations for each step. |
| Key | Description |
|---|---|
index |
A number containing the current step index. |
step |
The current step object from the steps array. |
navigation |
A navigation object (see below). |
isPaused |
true if the autoAdvanceDuration is paused. |
autoAdvanceDuration |
Duration of the current auto-advance. |
The navigation object returned from useStep contains control callback functions as follows.
| Key | Description |
|---|---|
previous |
Call to navigate to the previous item index. Wraps from the first item to the last item. |
next |
Call to navigate to the next item index. Wraps from the last item to the first item. |
go |
Call to navigate to a specific step by id or by index. Example: go(2) or go('billing-address') |
pause |
Pause auto-advance navigation. |
play |
Play auto-advance navigation once it has been paused. |
There's a simple multi-step control with 3 "pages". You use the "Previous" and "Next" buttons to navigate.
function App() {
  const {
    index,
    navigation: { previous, next },
  } = useStep({ steps: 3 });
  return (
    <div>
      <h1>Hello CodeSandbox</h1>

      {index === 0 && <div>This is step 1</div>}
      {index === 1 && <div>This is step 2</div>}
      {index === 2 && <div>This is step 3</div>}

      <div>
        <button disabled={index === 0} onClick={previous}>
          Previous
        </button>
        <button disabled={index === 2} onClick={next}>
          Next
        </button>
      </div>
    </div>
  );
}You can view/edit a photo carousel on CodeSandbox. It automatically advances after 5 seconds. You can also click previous/next, or navigate directly to a particular image.

useForm is for an advanced search, sign-up form, etc, something with a lot of text felds, because
you only need to use one hook. Wereas on the otherwise you would need many useState hooks.
Right here is some code for a sign-up form. As you can see it is using two useState hooks and we
need a lambda function to change it.
function App() {
const [firstName, setFirstName] = useState("");
const [lastName, setLastName] = useState("");
const [gender, setGender] = useState("Male");
const [isAccept, setAcceptToC] = useState(false);
return (
<div className="App">
<input
type="text"
value={firstName}
onChange={(ev) => {
setFirstName(ev.target.value);
}}
/>
<div>{firstName}</div>
<input
type="text"
value={lastName}
onChange={(ev) => {
setLastName(ev.target.value);
}}
/>
<div>{lastName}</div>
<div className="radio-group">
<div className="radio">
<input
type="radio"
value="Female"
checked={gender === "Female"}
onChange={(ev) => {
setGender(ev.target.value);
}}
/>{" "}
Female
</div>
<div className="radio">
<input
type="radio"
value="Male"
checked={gender === "Male"}
onChange={(ev) => {
setGender(ev.target.value);
}}
/>{" "}
Male
</div>
<div>Selected Gender: {gender}</div>
</div>
<div>
<div className="checkbox">
<input
type="checkbox"
value="true"
checked={isAccept === "true"}
onChange={(ev) => {
setAcceptToC(ev.target.checked);
}}
/>{" "}
I accept and agree Terms & Conditions.
</div>
</div>
</div>
);
}function App() {
const [{ firstName, lastName, gender, isAccept }, setValue] = useForm({
firstName: "",
lastName: "",
gender: "Male",
isAccept: false,
});
return (
<div className="App">
<input
type="text"
value={firstName}
name="firstName"
onChange={setValue}
/>
<div>{firstName}</div>
<input type="text" value={lastName} name="lastName" onChange={setValue} />
<div>{lastName}</div>
<div className="radio-group">
<div className="radio">
<input
type="radio"
value="Female"
checked={gender === "Female"}
onChange={setValue}
/>{" "}
Female
</div>
<div className="radio">
<input
type="radio"
value="Male"
checked={gender === "Male"}
onChange={setValue}
/>{" "}
Male
</div>
<div>Selected Gender: {gender}</div>
</div>
<div>
<div className="checkbox">
<input
type="checkbox"
value="true"
checked={isAccept === "true"}
onChange={setValue}
/>{" "}
I accept and agree Terms & Conditions.
</div>
</div>
</div>
);
}You see useForm takes the name of your input and changes the object, so you only have to create
one useForm. You can have as many items in the object, and this allows many inputs, but with still
one useForm. And it eliminates the use of a lambda function.
useForm also supports nested objects. This is useful for things like billing.city and shipping.city.
In your markup, you simply add the dots in the name field like this.
<input
  type="text"
  value="{billing.city}"
  name="billing.city"
  onChange="{setValue}"
/>const lightDurations = [5000, 4000, 1000];
const BeforeTrafficLight = ({ initialColor }) => {
const [colorIndex, setColorIndex] = useState(initialColor);
useEffect(() => {
const timer = setTimeout(() => {
setColorIndex((colorIndex + 1) % 3);
}, lightDurations[colorIndex]);
return () => clearTimeout(timer);
}, [colorIndex]);
return (
<div className="traffic-light">
<Light color="#f00" active={colorIndex === 0} />
<Light color="#ff0" active={colorIndex === 2} />
<Light color="#0c0" active={colorIndex === 1} />
</div>
);
};const AfterTrafficLight = ({ initialColor }) => {
const colorIndex = useTrafficLight(initialColor, [5000, 4000, 1000]);
return (
<div className="traffic-light">
<Light color="#f00" active={colorIndex === 0} />
<Light color="#ff0" active={colorIndex === 2} />
<Light color="#0c0" active={colorIndex === 1} />
</div>
);
};useNot is a toggle function for React components.
Here is a simple App that toggles a value to produce either a blue or a red square.
function App() {
  const [value, setValue] = useState(false);
  return (
    <div
      onClick={ value => (
        setValue( !value )
      )}
      style={{
        width: 100,
        height: 100,
        backgroundColor: value ? 'red' : 'blue'
      }}
    />
);function App() {
const [value, notValue] = useNot(false);
return (
<div
onClick={notValue}
style={{
width: 100,
height: 100,
backgroundColor: value ? "red" : "blue",
}}
/>
);
}value, a boolean, is a variable. notValuefunction that nots the value from true to false and
vise versa. Notice the notValue is not a lambda function, like in the before
On Dec 18, 2017, I did a talk at ReactNYC about the
useTrafficLight code above, but it was the "before" code and did not use a custom hook, and
certainly not react-hooks-helper because it was not out yet!
Here's my video.

MIT Licensed
Have you built an app (real or sample) using react-hooks-helper? Make a PR and add it to the list below.
Thanks goes to these wonderful people (emoji key):
 Revel Carlberg West 🚇 |
 Donavon West 💻 🤔 |
 Sunil Pai 📖 |
 Permadi Wibisono 💻 |
 Jang Rush 📖 |
This project follows the all-contributors specification. Contributions of any kind welcome!