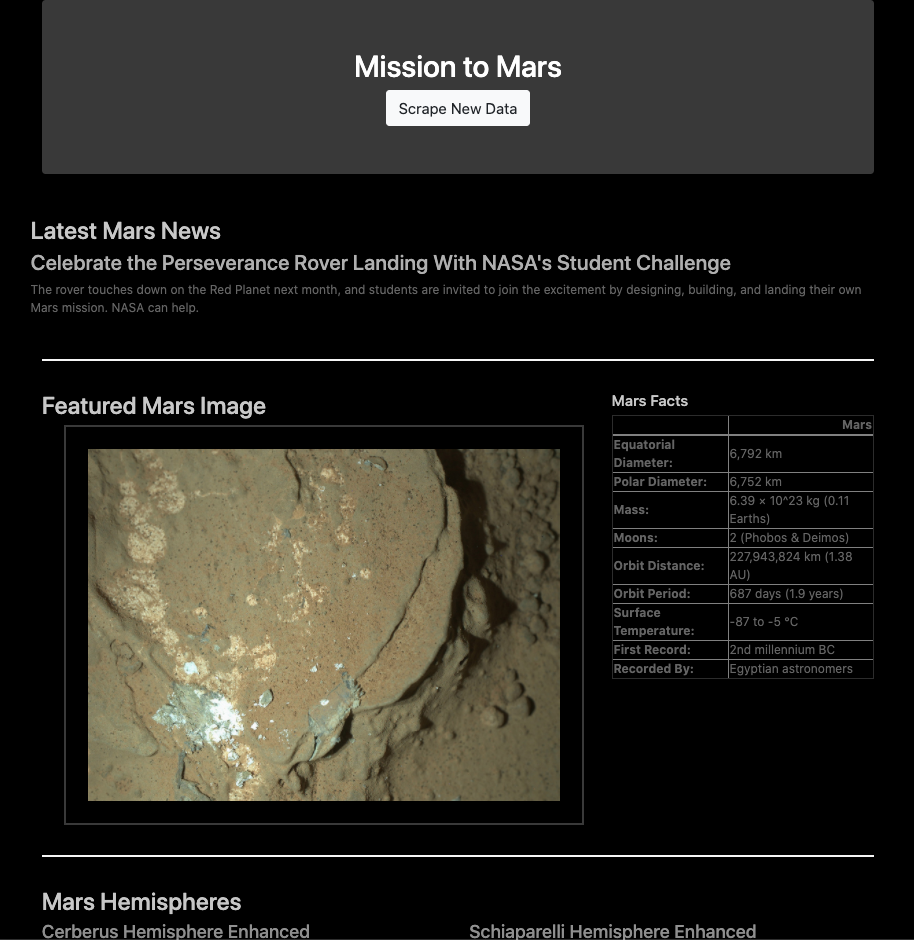
In this assignment, I built a web application that scrapes various websites for data related to the Mission to Mars and displays the information in a single HTML page. Used Jupyter Notebook, BeautifulSoup, Pandas, and Requests/SplinterThe to complete the assignment. Following outlines more details of the assignement:
- From NASA's Mars News webpage (https://mars.nasa.gov/news/), used BeautifulSoup to collect the latest News Title and Paragragh Text.
- Used Splinter to navigate NASA's webpage of Mars images (https://www.jpl.nasa.gov/spaceimages/?search=&category=Mars). Collected the URL for the current featured Mars Image from the site.
- Used Pandas to scrape a table from https://space-facts.com/mars/ that contains facts about the planet Mars. Once the table was collected, use Pandas to convert the data to a HTML table string.
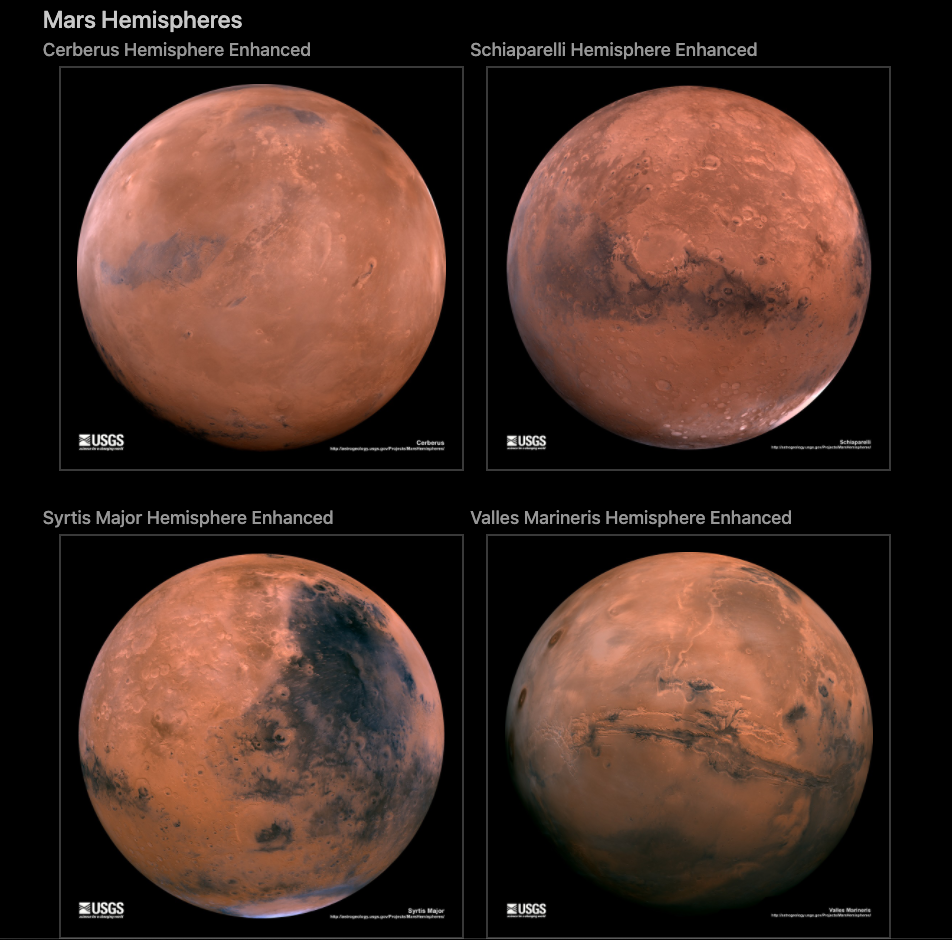
- Collected high resolution images for each of Mar's hemispheres from https://space-facts.com/mars/.
- Created a NoSQL database in MongoDB with a Flask application to create a new HTML page with the scraped data and images from above.
These instructions will get you a copy of the project up and running on your local machine for development and testing purposes. See deployment for notes on how to deploy the project on a live system.
What things you need to install the software and how to install them
The web applicaiton was built using MongoDB Compass Version 1.25.0
The web applicaiton was built using Python 3.7.6.
Python Library Requirements:
- PyMongo
- DateTime
- Request
- Datefinder
- Pandas
- Splinter
- Beautifulsoup4
- Google Chrome Driver
Step 1: Download MongoDB Compass from the following website:
Step 2: Open a terminal
- Mac:
- Click the Launchpad icon in the Dock, type "Terminal" in the search field, then click the Terminal icon. OR
- In the Finder, open the /Application/Utilities folder, then double-click Terminal.
- Windows:
- Click the Start ans search for "Command Prompt", then click the Command Prompt. OR
- Press Ctrl + r on your keyboard, type "cmd" and then click OK.
Step 3: In a terminal type the following:
- pip install pymongo [press ENTER] ...wait for the download to complete
- pip install DateTime [press ENTER] ...wait for the download to complete
- pip install requests [press ENTER] ...wait for the download to complete
- pip install datefinder [press ENTER] ...wait for the download to complete
- pip install splinter [press ENTER] ...wait for the download to complete
- pip install beautifulsoup4 [press ENTER] ...wait for the download to complete
- pip install chromedriver-py [press ENTER] ...wait for the download to complete
Step 4: Close the terminal window
Step 1: Open 3 terminals (Repeat the instructions three times)
- Mac:
- Click the Launchpad icon in the Dock, type "Terminal" in the search field, then click the Terminal icon. OR
- In the Finder, open the /Application/Utilities folder, then double-click Terminal.
- Windows:
- Click the Start ans search for "Command Prompt", then click the Command Prompt. OR
- Press Ctrl + r on your keyboard, type "cmd" and then click OK.
Step 2: Start the MongoDB Step 2.1: In the first terminal type the following: - brew services start mongodb-community@4.4 [press ENTER] ...wait for the Homebrew to start up Mongodb
Step 2.2: In the second terminal type the following: - mongo [press ENTER] ...wait for the your computer to connect to Mongodb
Step 3: Copy the "Mission_to_Mars" folder onto your hard drive:
Step 4: Start the Development Server: Step 4.1: In the thrid terminal map to the "Mission_to_Mars" folder you just saved to you computer and go into the folder - E.g. "cd Downloads/Mission_to_Mars" [press ENTER]
Step 4.2: In the thrid terminal type the following: - python app.py [press ENTER] ...wait for the development server to start - You should see the following: - * Serving Flask app "app" (lazy loading) * Environment: production WARNING: This is a development server. Do not use it in a production deployment. Use a production WSGI server instead. * Debug mode: on * Running on http://127.0.0.1:5000/ (Press CTRL+C to quit) * Restarting with fsevents reloader * Debugger is active! * Debugger PIN: ###-###-###
Step 5: Start the Application:
- Open web browser Google Chrome
- In the address bar of web browser type the following:
- http://localhost:5000/ [press ENTER] or
- http://127.0.0.1:5000/ [press ENTER]
- The following page should come up:

Step 6: Run the Application:
- Click the "Scrape New Data" button on the page. Another Google Chrome window will open, it will automatically move through the pages it is scraping information from. When the application is done scraping the data it will close and the original Google Chrome window will display the scraped information, see images below.
Vincent Adams
Thank you to my instructor Christopher Caudill and the TAs of the class: Justin Parker, Elsa Schieffelin, Matt Hawley, and Charles Dixon.