Build Mode
When you launch finsm, you'll be in Build mode by default. This is where you can make changes to your machine, including adding states, moving states, adding transitions, dragging transition arrows, editing state and transition labels, and designating states as final states.
States can be created by Shift-clicking anywhere on the screen where there are no states currently. A default state name will be given, which can be changed (see below).
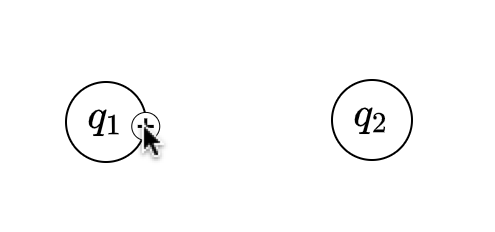
To create a transition arrow between two states (or a self-loop to one state),
start by hovering over the edge of the source state. A circular (+) button
will show up to indicate that an arrow will be adding starting at the current
state:
Next, hold down the left mouse button to begin creating an arrow:
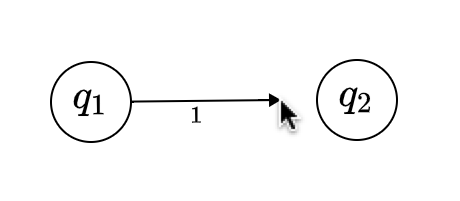
Keeping the mouse button held down, drag your mouse over top of another state. The state will light up in a bold blue line to indicate that the arrow will be attached there. To create the arrow, simply let go of the mouse button. A new transition will be created.
To create self-loops, drag the arrow's head to the state in which you started. The state will also light up and the arrow's shape will change to indicate that a self-loop will be created.
To modify a transition, hold SHIFT and click on the label you wish to change. The rendered LaTeX will switch to a textbox. Simply type in the new label you want your transition to have. When you are done, hit the ENTER key to exit, and your newly-made changes will be saved.
Oh, did I say something about rendering LaTeX? That's right, you can enter
LaTeX expressions and finsm will render that for you! Our LaTeX rendering is
done with MathJax, so anything they support, we
support! Note that you do not have to surround your symbols with $ or $$.
This will be exactly the same as editing transition labels. But you probably figured out the LaTeX rendering if you've tried editing states first :)
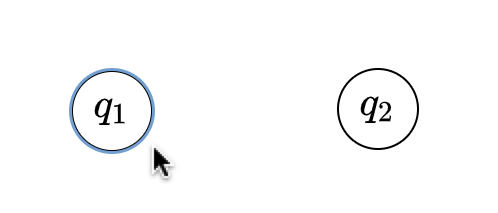
To select a state, click near the edges of a state. You can tell
if you've selected a state when the state lights up in blue, as in the following
image:
There are three actions you can take after selecting the state:
- Moving: Simply drag the selected state to your desired position on the screen
- Deleting: Hitting the D button on your keyboard will wipe the selected state from existence, and all state transitions (arrows) coming in or out of this state will be deleted as well.
- Mark as final state: Important for simulation and exporting! Marking a state as final helps you to verify your state machine when you test it, and IT WILL SHOW UP AS FINAL AS WELL WHEN EXPORTED (More on exporting later). Hit the F button to toggle states between final and non-final
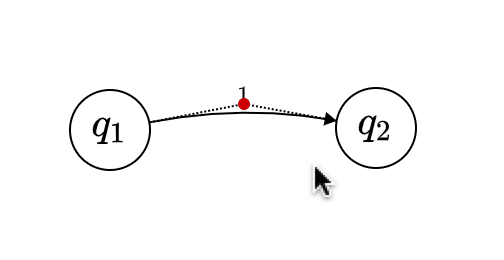
To select a state transition arrow, click the arrowhead. You will know if it's
selected when dotted lines appear, joined by a central red dot, as in the following image:
There are two actions you can take after selecting an arrow:
- Moving: Drag the red point in any direction. This adjusts the curvature of the arrow, and the direction of the curvature.
- Deleting: Pressing D will delete the current arrow, and its associated state transition.
If you've made a mistake somewhere, and you wish to undo, press Ctrl+Z to undo your last action. To redo, press Ctrl+Shift+Z.
Note that undos and redos are shared across all finsm modes- If you made a change in Build mode, then switched to Simulating mode, an undo command will switch you back to your previous work in Build! The same rule applies for all modes.